Pages

Wednesday, December 14, 2011

Last minute Zucchini and Chorizo Pasta.


You know when you haven't been to the shop for a while and you look in the fridge and the cupboards and at first it doesn't look like anything is there? This is when you have to get creative. Tonight was a little like that. I ended up finding one tomato in the bottom drawer of the fridge, a zucchini from my garden (which Coco had eaten about a quarter of) and three chorizo in the freezer, oh and some gluten free pasta. I had to improvise with garlic out of a jar instead of fresh cloves, and luckily we had parmesan which you can pretty much put on anything and it gives it an instant make over. So dinner was a success and it was so cool using up little bits and pieces of ingredients and not wasting food, i love that. Here is my recipe for the pasta:

Gluten free pasta (enough for two)
1 Vine tomato sliced
1 Zucchini sliced
A big handful of basil chopped
3 Chorizo sausages
Olive oil
1 Tsp crushed garlic (real garlic would be better)
Parmesan
Salt and Pepper

Heat oil in a pan and add garlic, throw in the chorizo and cook for a few minutes then add the tomato and zucchini. Cook for another few minutes and then stir through the cooked pasta, add the basil in at the last minute and top with parmesan ! Add salt and pepper to taste. Ta da.

Sunday, December 11, 2011

Orange, honey and almond chocolate cookies.


I made these the other day for husband as a total experiment (not unusual for me), and they turned out pretty great (kindof unusual for me). I didn't use a recipe as such i just threw some things together so i'll just write out roughly what i did. What i love about these is that we used eggs from our friends farm, oranges from their orchard, and honey from my dad's hives. It's the best thing using local organic ingredients, especially from people we know.

Recipe:
1 egg
1 cup organic white flour
1 tsp baking powder
100 g butter (softened)
1 tsp orange zest
50 g Whittakers dark almond chocolate (broken into little pieces
2 tbspn honey
a few drops of real vanilla essence

Beat together honey, butter, and vanilla. Add egg and zest and mix, then stir in dry ingredients. Put small spoonfuls on trays and bake at 180 for around 10 minutes. So easy x

Tuesday, December 6, 2011

We have a 6 month old.


Yes, i am ashamed to say it has been that long since i have posted anything.. In that time i have planted an entirely new garden, and we've even eaten our first brocolli (again) but this time there was three of us to eat it. Baby girl is all about her food and is joining in on mealtimes with us now. We're doing Baby Led Weaning with her, which pretty much means that she eats with us and we just share our food with her. Pretty fun (in a really messy kinda way!) I'm really loving this being a mum thing a lot, she is rather amazing.

Sunday, July 31, 2011

Garden.


My first broccoli! I am so proud. We have been eating fresh, organic greens out of my garden for the last couple of months, i love going outside to pick our salad before dinner. It's the best feeling growing our own food! So far i've had success with rocket, baby spinach, silverbeet, and brocolli. It's kindof survival of the fittest in that garden, the lettuces didn't quite make it. Excited to start some planter boxes at our next place! x

Thursday, July 28, 2011

This face.


Being a mumma is such an indescribably wonderful thing. Everyday i love this little girl more and more. What a perfect little person she is x

Sunday, July 24, 2011

Home.


It's been nearly five months now since we left Wanaka and moved north to the beautiful Mount Maunganui. Our little one bedroom ground floor abode has been the perfect place for us to start (a fully furnished house is a handy thing when all your worldly belongings are what you fitted into one car!) but sometimes opportunities come up that you just don't want to miss! Our friends have the most wonderful little beach bach just up the road and we have been admiring it for a while now, so we were really excited when they told us they'd bought a house and that their place would be becoming free! We nervously applied... and got it! The best thing about this house, aside from the fact that it overlooks the most stunning part of the ocean, is that it has a room for Coco.. and it is just the most perfect little girls room (I'll post photos). It's a big step for us, the house has no furniture, not even whiteware, but since we decided to take it everything has been falling into place and we've already got most of what we need. In fact we just bought a bed today, eek! It is such a good feeling getting our own things, i'm looking forward to having a blank canvas that we can make totally ours and turning this little house into a home. Here are some images which are giving me some great ideas right now..


Friday, July 8, 2011

iphone happiness.


My husband bought me an iphone! He is literally amazing. I am so happy i get to take pictures of my little bunny all the time now and capture our lives in such a fun way. It's also really nice to throw away my old phone which i have had for the last 6 years! that is some serious dedication to keep a phone that long! Man i am one spoilt girl.
ps look at those lil cheeks! x

Wednesday, July 6, 2011

Another girl in the house.


I just bought Coco one of these beautiful headbands from Etsy. You know just for special occasions x

Friday, July 1, 2011

Coco


Ok, so the last 5 and a half weeks have been a blog write off... We have a baby now though! Good excuse huh.. She is so wonderful! Coco Milly de Beer was born on May 23rd at 1am, weighing in at 7lbs 11oz, she is a total champ and is keeping us super busy! I am completely obsessed with taking photos of her, she may feature on here a little from now on, maybe less cakes and cookies and more Coco, who has time for baking right now!
x

Saturday, May 14, 2011

Paper lanterns


I have been searching for some really pretty lights to use for night lights once baby is around, I found these on Etsy, i think i might have to buy some. (Plus it's always fun getting things sent in the mail...) x

Tuesday, April 26, 2011

Tea and scones


On Monday morning we woke up and made tea and scones for breakfast, just to celebrate the day. We ate allll of them. I used the edmonds cookbook recipe and it was lovely!

Best Ever Scones


Preparation Time: 10 minutes
Cooking Time: 15 minutes

3 cups flour
6 teaspoons Edmonds baking powder
¼ teaspoon salt
75g butter
1 - 1½ cups milk, approximately
extra milk for glazing

Instructions

1. Preheat oven to 220oC. Sift flour, baking powder and salt into a bowl. Cut butter in until the mixture resembles fine breadcrumbs.

2. Add 1 cup milk and mix quickly with a knife to a soft dough, adding more milk if needed. Knead a few times.

3. Lightly dust an oven tray with flour. Press scone mix out on floured bench or tray, cut into 12 even-sized pieces. Place on oven tray, brush tops with milk and place in top half of oven to bake

4. Bake scones for about 10 minutes or until golden brown. Once golden brown with crisp crusts, remove from the oven and allow to cool. Cooling on a rack will give you crisp crusts, while covering them with a clean tea towel will give a soft scone.

Enjoy! x

Tuesday, April 5, 2011

A little bit of cute


I found this picture in my friend Emily's collection. Is it the cutest thing you've ever seen or what? Makes me so excited about having a little baby girl to dress in only 6 weeks! x

Thursday, March 24, 2011

Making new from old

I have seen some cool ideas lately for re using and recreating. While i was exploring around some blogs i found these on Poppytalk.


Using old jars for vases and growing herbs

Old scrabble frames for shelves

Headboard made from wooden crates


Tuesday, March 22, 2011

Early Easter


The latest craze in our household right now is hot cross buns (with way too much butter on them). Yesterday Brandon and our friend Lyndon ate an entire packet in one go. I don't know what we're going to do when easter is over... I thought just to be safe, i'd learn how to make them myself. Here is such a great recipe i found on simply recipes:


Hot Cross Buns

INGREDIENTS

  • 1 1/4-ounce package active dry yeast (about 2 1/2 teaspoons)
  • 3/4 cup warm milk
  • 3 1/4 to 3 1/2 cups all purpose flour
  • 1/4 cup plus 1 teaspoon granulated white sugar
  • 2 teaspoons ground spices (for example, 1/2 teaspoon cardamom, 1/2 teaspoon cinnamon, 1/2 teaspoon allspice, 1/4 teaspoon cloves, 1/4 teaspoon nutmeg)
  • 1 teaspoon salt
  • 4 Tbsp butter, softened
  • 2 eggs, room temperature (if taking right out of the fridge, let sit in warm water for a few minutes to take the chill off before using)
  • 3/4 cup currants (can sub half of currants with chopped candied citrus peel)
  • 2 teaspoons grated orange zest

Glaze

  • 1 egg
  • 1 Tbsp milk

Frosting

  • 1 teaspoon milk
  • 3 to 4 Tbsp powdered sugar

METHOD

1 In a bowl, stir together 1/4 cup of the warmed milk and one teaspoon of sugar. Sprinkle the yeast over the milk and let sit for 5-10 minutes until foamy.

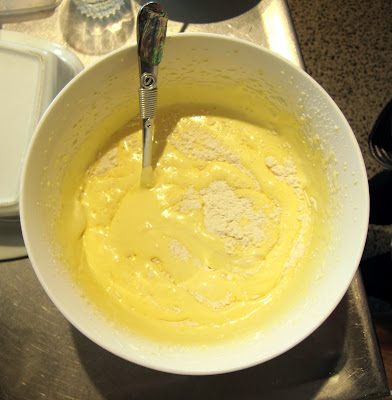
2 In a large bowl or the mixing bowl of an electric mixer, vigorously whisk together 3 cups of the flour (reserving additional flour for later step), the salt, spices, and 1/4 cup of sugar.

3 Create a well in the flour and add the foamy yeast, softened butter, and eggs, and the remaining milk. Using a wooden spoon or the paddle attachment of your mixer, mix the ingredients until well incorporated. The mixture should be shaggy and quite sticky. Add in the currants, candied peel, and orange zest.

4 If you are using a stand-up mixer, switch to the dough hook attachment and start to knead on low speed. (If not using a mixer, use your hands to knead.) Slowly sprinkle in additional flour, a tablespoon at a time, kneading to incorporate after each addition, until the flour is still slightly tacky, but is no longer completely sticking to your fingers when you work with it.

5 Form a ball of dough in the bowl and cover with plastic wrap. Let sit, covered, at room temperature (or in a warm spot) for 2 hours, until the dough has doubled in size.

6 Press down on the dough to gently compress it. Roll the ball of dough into a log shape and cut it into two halves. Place one half back in the bowl while you work with the other half. Take the dough half you are working with and cut it into 8 equal pieces. The easiest way to do this is to roll it into a log, cut it in half, then roll those pieces into logs, cut them in half, and then do it again, roll those pieces into logs, and cut them in half.

Take the individual pieces and form them into mounds, placing them 1 1/2 inches apart from each other on a baking sheet. Cover with plastic wrap and then work the remaining dough into 8 equal pieces and place them in mounds on a baking sheet, again cover with plastic wrap. Let the dough mounds sit at room temperature (or warm place) to rise again, until the mounds have doubled in volume, about 30-40 minutes.

7 Preheat oven to 400°F. Prepare egg wash by whisking together one egg and a tablespoon of milk. If you want, you can score the top of the buns with a knife in a cross pattern. You will want to make fairly deep cuts, for the pattern to be noticeable after they're done. Using a pasty brush, brush on the egg wash over the dough mounds. The egg wash will give them a shiny appearance when cooked.

8 Place in the middle rack of the oven and cook for 10-12 minutes, until the buns are lightly browned. Remove from oven and let cool on the pan for a few minutes, then transfer the buns to a wire rack to cool.

9 To paint a cross on the top of the buns, wait until the buns have cooled (or the frosting will run). Whisk together the milk and the powdered sugar. Keep adding powdered sugar until you get a thick consistency. Place in a plastic sandwich bag. Snip off a small piece from the corner of the bag and use the bag to pipe two lines of frosting across each bun to make a cross.

Makes 16 buns.

Wednesday, March 9, 2011

We made it


Here it is! a little snap of our house at the beach which we are very excited to be at. x

Thursday, February 24, 2011

Moving house


Right now we are packing up our whole lives and trying to fit the contents into one car. I think when we drive outta here on monday we're going to look something like this!

Tuesday, February 15, 2011

Valentines with my LOVE


I love you my valentine, you are a surprisingly good cook X

Gems


I seem to have deviated in recent posts from my healthier recipes. These are just straight up bad for you... but it was valentines day and i know Brandon loves them... so i made some. Here is the recipe if you want to try these unhealthy treaties.

180g butter, softened
2 teaspoons vanilla
1/3 cup icing sugar
2 cups plain flour

filling
125g butter, softened
1 cup icing sugar
1/3 cup passionfruit pulp (i used lemon zest and juice)

pre heat oven to 180C. Place butter, vanilla and sugar in bowl and beat for 4-5 mins or until light and creamy. Add flour and mix until dough forms. Roll teaspoonfuls of the mixture into balls, place on baking tray lined with non stick paper and press lightly with a fork. Bake 10-12 mins. Cool on wire rack. To make passionfruit/lemon filling, beat together butter and icing sugar until creamy. Add passionfruit pulp and beat for 3-4 mins. Sandwich the biscuits together with the passionfruit filling to serve. x

Sunday, January 30, 2011

Hi baby


Babies are the best, so far ours is only the size of a spaghetti squash but we already love her and she is beginning to develop her own little personality, we can't wait to meet her! she also really likes to eat nutella and fries lately.

Thursday, January 20, 2011

Mini cupcake heaven

Yesterday my 11 year old friend Poppy came over to do some baking, she had her heart set on cupcakes and had even bought her box of baking goodies with her. She also happens to be a major sweet tooth so her favourite part was making (and trying) the icing. We used a recipe from my 'Ladies, a plate' cookbook and had such a fun morning creating these delicious mouthfuls.

FOR THE CAKES
4 oz butter
3/4 cup caster sugar
2 eggs
1 1/2 cups flour
1 tsp baking powder
1/2 cup milk
1 tsp vanilla essence

FOR THE BUTTER CREAM ICING
2 cups icing sugar
4 oz butter
2 tbsn milk
1/2 tsp vanilla essence

GETTING READY
Preheat oven to 180C and put paper cases into 24 cupcake tins. Soften butter. Bring eggs to room temperature.

MIXING AND BAKING
1. Cream butter until smooth, add the sugar gradually and beat until the mixture is light and fluffy.
2. Add the eggs one at a time, beating for at least a minute after each addition.
3. Sift the flour and baking powder together and add to the mixture alternately with the milk and vanilla.
4. Spoon into the paper cases and bake for about 20 minutes. Cool on rack.

FINISHING
1. Make the icing by combining half the sifted icing sugar with the softened butter, milk and vanilla and beating until smooth.
2. Add the remaining icing sugar gradually, mixing until the icing is a good spreading consistency. Tint with food colourings and as the cookbook says "embelish your creations as your fancy takes you". (we divided the mixture in half and put natural pink food colouring in one half and lemon juice and zest in the other... the lemon were my favourite. We also used a piping bag to ice them.)
You can make regular size or mini, mini are a bit cuter X


Monday, January 17, 2011

Inspire me please

Sometimes i get so stuck in my own ideas and thoughts, i love it when i see things that inspire me and make me want to do something myself. My friend Eldrid has the most beautiful blog, it's so good when people share ideas, it gives me motivation. I especially love her pictures on her blog of frames in her house. We are moving soon (6 weeks to be exact!) and i am really excited about decorating our new house already. I think i am going to have a wall with beautiful frames, some with photos, words, mirrors, and just blank frames. I think i'll start working on them now...


Saturday, January 15, 2011

Banana chocolate chunk muffins


Ingredients:

3 big or 4 small very ripe bananas, mashed
3 tbsn honey
100g butter, melted
1 egg
2 tbsp organic milk
1½ cups stoneground organic white flour
1 tsp baking soda
1 tsp baking powder
1 cup chocolate - broken up into chunks


What to do:

1. Heat oven to 190°C (170°C fan bake). Grease a 12-hole standard muffin pan or line with paper cases, mine only made enough for 10.

2. In a bowl, place mashed bananas, honey, melted butter, egg and milk and stir to combine.

3. Sift flour, baking powder and baking soda onto banana mixture and stir to just combine. Stir in chocolate bits.

4. Spoon mixture into muffin tins and bake for 20 to 25 minutes, or until they look perfect and delicious.


These are GOOOOD! x


Tuesday, January 11, 2011

Classic sponge sandwich - with cream and fresh plums

You know how sometimes you get given a present that you really wanted.. it's the best feeling, and it shows that the person who gave it to you really knows you. My beautiful friend Naomi and her family gave me a cook book for my birthday called 'Ladies, a plate'. I saw this book when i was on honeymoon on Waiheke Island and have desperately wanted it ever since. While we were staying with Naomi's family at their farm a couple of weeks ago i used it for the first time and made a plum and cream filled sponge cake. We picked the plums from the tree outside the house, i love using ingredients from home.

Here's the recipe:

FOR THE CAKE
3 large eggs
6 oz caster sugar
4 oz flour
1 tsp baking powder
1 tbsp butter
4 tbsp boiling water

FOR THE FILLING
1 cup cream
2-3 tbsp jam (we didn't have any, i used plums instead, but you could use both)

getting ready:
preheat oven to 190C. Grease two 20cm round sandwich tins and line bases with circles of baking paper. Bring eggs to room temperature. Sift together flour and baking powder.

mixing and baking:
1. Beat the eggs and caster sugar fro 10 mins with an electric beater. They should be very fluffy and pale yellow and the mixture should fall in ribbons from the beaters and remain on the surface for a few seconds before sinking.
2. Sift the flour and baking powder again onto the top of the egg mixture and fold carefully through, using a large shallow metal spoon. Cut through with the edge of the spoon, gently lifting the mixture and turning the bowl as you go.
3. Lastly add the butter, melted in the boiling water, and fold through gently and thoroughly.
4. Pour the mixture into the prepared tins. Bake the sponges for about 20 minutes. It's better not to try and rotate the tins as they might sink.
5. Remove from the oven and after a few minutes, turn the cakes onto a cooling rack.

FINISHING
Put one sponge upside down on a pretty plate, spread it with your best jam and then a generous layer of whipped cream, sweetened or not as you wish*. Put the other sponge on top, right side up, and sift over a little icing sugar. (You could sift the icing sugar through a stencil or paper doily if you like that idea.)

*I put the plums on here, you could use berries too.